
Capturing stunning Milky Way photos requires careful planning, the right equipment, and some photography techniques. Here’s a step-by-step guide on how to take Milky Way photos.
How to take Milky Way photos with DSLR

- Choose the right time and location: ( How to take Milky Way photos )
- Research and find a location with minimal light pollution. Dark sky areas or remote locations away from city lights are ideal.
- Check weather conditions and choose a clear night with minimal cloud cover.
- Determine the time when the Milky Way is visible. This varies depending on your location and the time of year. You can use various apps and websites like Stellarium, PhotoPills, or Dark Sky Finder to assist you in planning. ( How to take Milky Way photos with DSLR )
- Gear and equipment: ( How to take Milky Way photos )
- Use a DSLR or mirrorless camera that allows manual settings for shutter speed, aperture, and ISO.
- Select a wide-angle lens with a low aperture (f/2.8 or lower) to capture as much light as possible and a focal length between 14mm and 35mm.
- Bring a sturdy tripod to keep your camera stable during long exposures.
- Consider using a remote shutter release or intervalometer to minimize camera shake.
- Camera settings:
- Set your camera to manual mode.
- Open the aperture to the widest setting (e.g., f/2.8).
- Set the ISO between 1600 and 3200, depending on your camera’s low-light performance.
- Choose a longer shutter speed to gather enough light. Start with 20-30 seconds and adjust as needed. Avoid going too long to prevent star trails unless that’s the effect you desire.
- Disable image stabilization or vibration reduction on your lens if you’re using a tripod.
- Enable long exposure noise reduction if available on your camera to reduce digital noise.
- Framing and composition:
- Compose your shot with an interesting foreground element like a tree, mountain, or landmark. This adds depth and context to your Milky Way photo.
- Experiment with different compositions and angles to find the most visually appealing frame.
- Use the rule of thirds or other compositional techniques to create a balanced composition.
- Manual focus:
- Switch your lens to manual focus mode.
- Set the focus to infinity. If your lens has a distance scale, set it to the infinity symbol (∞).
- Alternatively, use live view mode to zoom in on a bright star and manually adjust the focus until it appears sharp.
- Take test shots and adjust:
- Take a few test shots to ensure the exposure, focus, and composition are correct.
- Review the images on your camera’s LCD screen and make adjustments as needed.
- If your images appear too dark or noisy, you can increase the ISO slightly or lengthen the exposure time. Conversely, decrease the ISO or shorten the exposure if the images are overexposed.
- Shoot multiple images:
- Consider capturing multiple shots to create a panoramic or composite image of the Milky Way.
- Use the “bulb” mode or a remote shutter release to take long-exposure shots without manually holding the shutter button down.
- Post-processing:
- Transfer the images to your computer and use photo editing software like Adobe Lightroom or Photoshop to enhance the Milky Way.
- Adjust exposure, contrast, white balance, and clarity to bring out the details.
- Take care not to overprocess and maintain the natural look of the night sky.
Remember, practice and experimentation are key to achieving great Milky Way photos. Each location and shooting condition can present unique challenges, so don’t be discouraged if your first attempts are not perfect. Keep learning and refining your technique, and you’ll capture stunning images of our galaxy. (How to take Milky Way photos with DSLR)
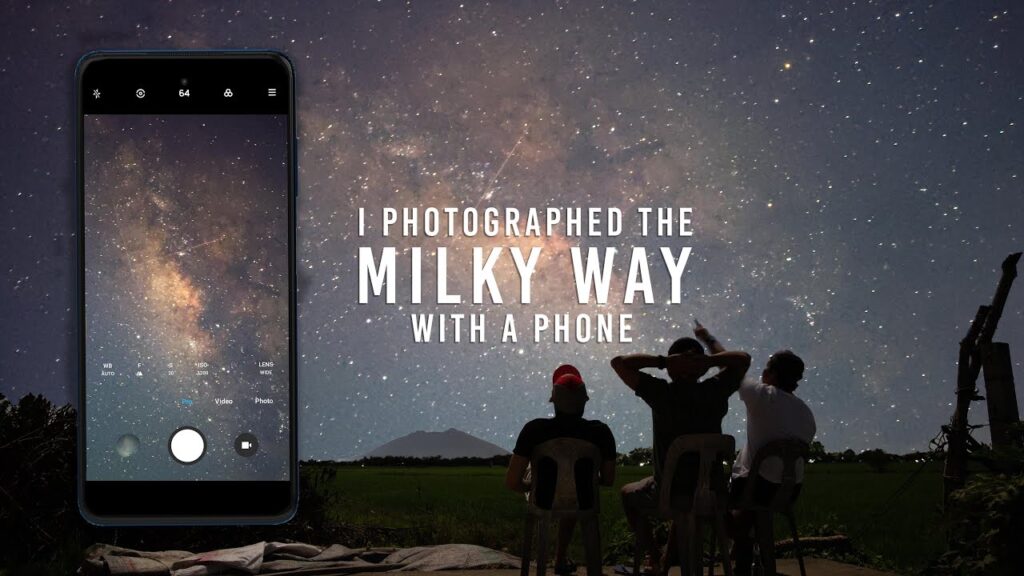
How to take Milky Way photos with Phone

Capturing Milky Way photos with a phone can be challenging, as phone cameras typically have limited capabilities for low-light photography. However, with some adjustments and techniques, you can still capture decent Milky Way shots. Here’s how: ( How to take Milky Way photos with phone )
- Find a Dark Sky Location: As mentioned earlier, choose a location away from light pollution to enhance your chances of capturing the Milky Way. ( How to take Milky Way photos )
- Manual Mode: Some smartphones have manual camera controls or a dedicated night mode that allows you to adjust settings manually. Look for these options in your phone’s camera app.
- Adjust Exposure Settings: Increase the exposure time (shutter speed) to let in more light. Keep in mind that longer exposure times can result in motion blur, so you may need to find a way to stabilize your phone, such as using a tripod or resting it on a steady surface.
- ISO Settings: Increase the ISO to make the camera sensor more sensitive to light. However, be cautious as higher ISO settings can introduce noise or graininess in the image. Experiment with different ISO values to find the balance between capturing enough light and minimizing noise.
- Manual Focus: In low-light situations, autofocus may struggle. Switch to manual focus mode and adjust the focus manually to ensure the stars appear sharp. Some phone camera apps have a “manual focus” or “pro” mode that allows you to adjust the focus manually.
- Use a Third-Party Camera App: If your phone’s default camera app lacks manual controls, consider using a third-party camera app that provides more flexibility and control over settings. Apps like ProCam, Camera FV-5, or Moment Pro Camera are popular options.
- Avoid Zooming: Digital zoom can degrade image quality, especially in low-light conditions. Instead, try to frame your shot without zooming and consider cropping the image later during post-processing if needed.
- Post-Processing: Once you’ve captured the Milky Way photos, you can enhance them further using photo editing apps or software. Adjust the brightness, contrast, and sharpness, and reduce noise if necessary. However, be mindful not to overprocess the image, as it can result in an unnatural look. ( How to take Milky Way photos )
Remember that capturing Milky Way photos with a phone has its limitations, and the results may not be as impressive as those taken with dedicated cameras and lenses. Nonetheless, with careful planning, experimentation, and a bit of post-processing, you can still capture some stunning night sky images. ( How to take Milky Way photos with phone )
How to take Milky Way photos with iPhone
Capturing Milky Way photos with an iPhone is possible, although it may be more challenging due to the limitations of the phone’s camera compared to dedicated cameras. Here’s a step-by-step guide to help you take Milky Way photos with an iPhone: ( How to take Milky Way photos with iPhone)
- Find a Dark Sky Location: Look for a spot away from light pollution where you can get a clear view of the night sky. Dark sky locations are essential for capturing the Milky Way. ( How to take Milky Way photos )
- Use a Tripod or Stabilize Your iPhone: Stability is crucial for capturing clear, sharp images in low-light conditions. Use a tripod or find a stable surface to rest your iPhone on to minimize camera shake.
- Use Manual Camera Apps: The default iPhone camera app doesn’t provide full manual controls, so consider using third-party camera apps that offer more manual settings. Apps like ProCamera, Halide, or Camera+ 2 provide options to adjust exposure, ISO, and focus manually.
- Enable Night Mode: If your iPhone model has a dedicated night mode, enable it. Night mode uses computational photography techniques to capture multiple images and combine them to reduce noise and enhance details in low-light conditions.
- Adjust Exposure Settings: In manual camera apps, experiment with longer exposure times (shutter speed) to capture more light. Start with a few seconds and gradually increase the exposure time as needed. Note that longer exposures may result in star trails due to Earth’s rotation, so find a balance that works for you.
- Adjust ISO: Increase the ISO setting to make the camera sensor more sensitive to light. Higher ISO values can introduce noise, so try to find a balance between capturing enough light and minimizing noise. Experiment with different ISO settings to find the optimal one for your situation.
- Manual Focus: Switch to manual focus mode and adjust the focus manually to ensure the stars appear sharp. Tap on a bright star or use a distant light source to help you achieve focus. Some camera apps also offer focus peaking or magnification tools to assist with manual focus.
- Avoid Zooming: Digital zoom can degrade image quality, especially in low-light conditions. It’s better to avoid zooming and instead capture the photo without zoom, and then crop it later during post-processing if needed.
- Use Self-Timer or Remote Shutter: To minimize camera shake, use the self-timer function or a remote shutter release to trigger the photo without physically touching the iPhone.
- Post-Processing: After capturing the Milky Way photos, you can further enhance them using photo editing apps like Snapseed, Lightroom, or Darkroom. Adjust the brightness, contrast, and sharpness, and reduce noise if necessary. Be mindful not to overprocess the image to maintain a natural look. ( How to take Milky Way photos )
Remember, the capabilities of iPhone cameras may vary depending on the model and software version. Experiment with different settings and apps, and don’t hesitate to try multiple times to get the desired results. ( How to take Milky Way photos with iPhone)
How to take Milky Way photos with Canon
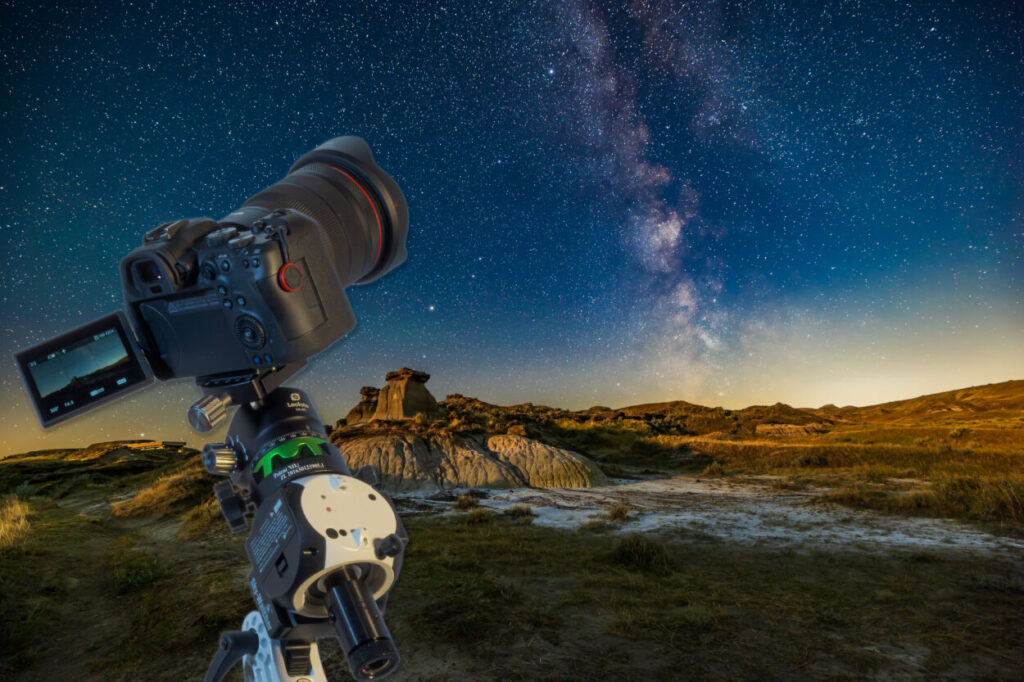
Taking Milky Way photos with a Canon camera can yield excellent results. Here’s a step-by-step guide to help you capture stunning Milky Way shots with a Canon camera: ( How to take Milky Way photos with Canon)
- Prepare the Right Equipment: ( How to take Milky Way photos )
- Canon DSLR or mirrorless camera: These cameras offer manual control and interchangeable lenses, providing more flexibility for astrophotography.
- Wide-angle lens: A lens with a focal length between 14mm and 24mm is ideal for capturing a wide field of view and including more of the Milky Way.
- Sturdy tripod: It’s essential to keep the camera steady during long exposures.
- Remote shutter release or intervalometer: This helps prevent camera shake when triggering the shutter.
- Find a Dark Sky Location: ( How to take Milky Way photos )
- Research and choose a location away from light pollution for optimal Milky Way visibility.
- Check weather conditions for clear skies and minimal cloud cover.
- Set Up Your Camera:
- Mount your Canon camera on the tripod and ensure it’s securely attached.
- Insert a fully charged battery and a memory card with sufficient space.
- Manual Mode and RAW Format:
- Switch your Canon camera to manual mode (M) for full control over settings.
- Shoot in RAW format to retain maximum detail and flexibility in post-processing.
- Adjust Settings:
- Aperture: Set the lens aperture to its widest opening (e.g., f/2.8 or lower) to allow more light into the camera.
- ISO: Start with an ISO setting around 1600 or 3200 and adjust as needed to capture enough light without introducing excessive noise.
- Shutter Speed: Experiment with exposure times between 10 to 30 seconds. Longer exposures can capture more stars but may result in motion blur if not using a star tracker.
- Manual Focus:
- Switch the lens to manual focus mode.
- Set the focus to infinity (∞) or slightly before (∞ – ∆) to ensure sharp stars. Use the lens’s focus distance scale or zoom in on a bright star in live view mode for precise focusing.
- Frame Your Shot:
- Compose your photo to include interesting foreground elements or landscapes.
- Aim to capture the Milky Way core or other prominent parts of the galaxy.
- Take Test Shots and Refine Settings:
- Take a few test shots to assess exposure, focus, and composition.
- Review the images on your camera’s LCD screen and make adjustments as necessary.
- Remote Shutter Release or Timer:
- Use a remote shutter release or the camera’s built-in timer to trigger the shutter without touching the camera, minimizing camera shake during long exposures.
- Capture Multiple Exposures:
- Take several exposures to create a series of images for stacking later in post-processing. This technique helps reduce noise and enhance details. ( How to take Milky Way photos )
- Review and Post-Processing:
- Transfer the images to your computer for post-processing.
- Use software like Adobe Lightroom, Capture One, or specialized astrophotography tools to adjust exposure, contrast, sharpness, and reduce noise.
- If necessary, align and stack multiple exposures to enhance the Milky Way and minimize noise.
Remember, practice is key to capturing stunning Milky Way photos. Experiment with different settings, compositions, and locations to refine your technique and achieve the desired results with your Canon camera.
You Might Like-
10 Most Expensive Buildings In The World 2023
Is Time Travel Possible? What If Time Travel Is Already Solved 2023
Ceylebrity News And Blog- WWW.CEYLEBRITYNEWS.COM
Visit Our Online Shopping Website- WWW.CEYLEBRITY.COM
Ceylebrity Sinhala News And Articles- WWW.CEYLEBRITYNEWS.LK
Share.......


https://www.aikos.smm.lt/Lists/ContactUs/DispForm.aspx?ID=37297 amoxil 500 mg
sildalist 100+20mg https://experienceleaguecommunities.adobe.com/t5/user/viewprofilepage/user-id/17928484
5mg cialis best time to take https://cipillsvi.com/#
https://elearning.adobe.com/profile/tadapox buy tadapox online
buy drug without prescription: drugs without a doctors prescription – buy drugs no prescription
https://ridesmartflorida.com/scavista-12/ generic stromectol